Wednesday, November 30, 2011

Paper Making Demo

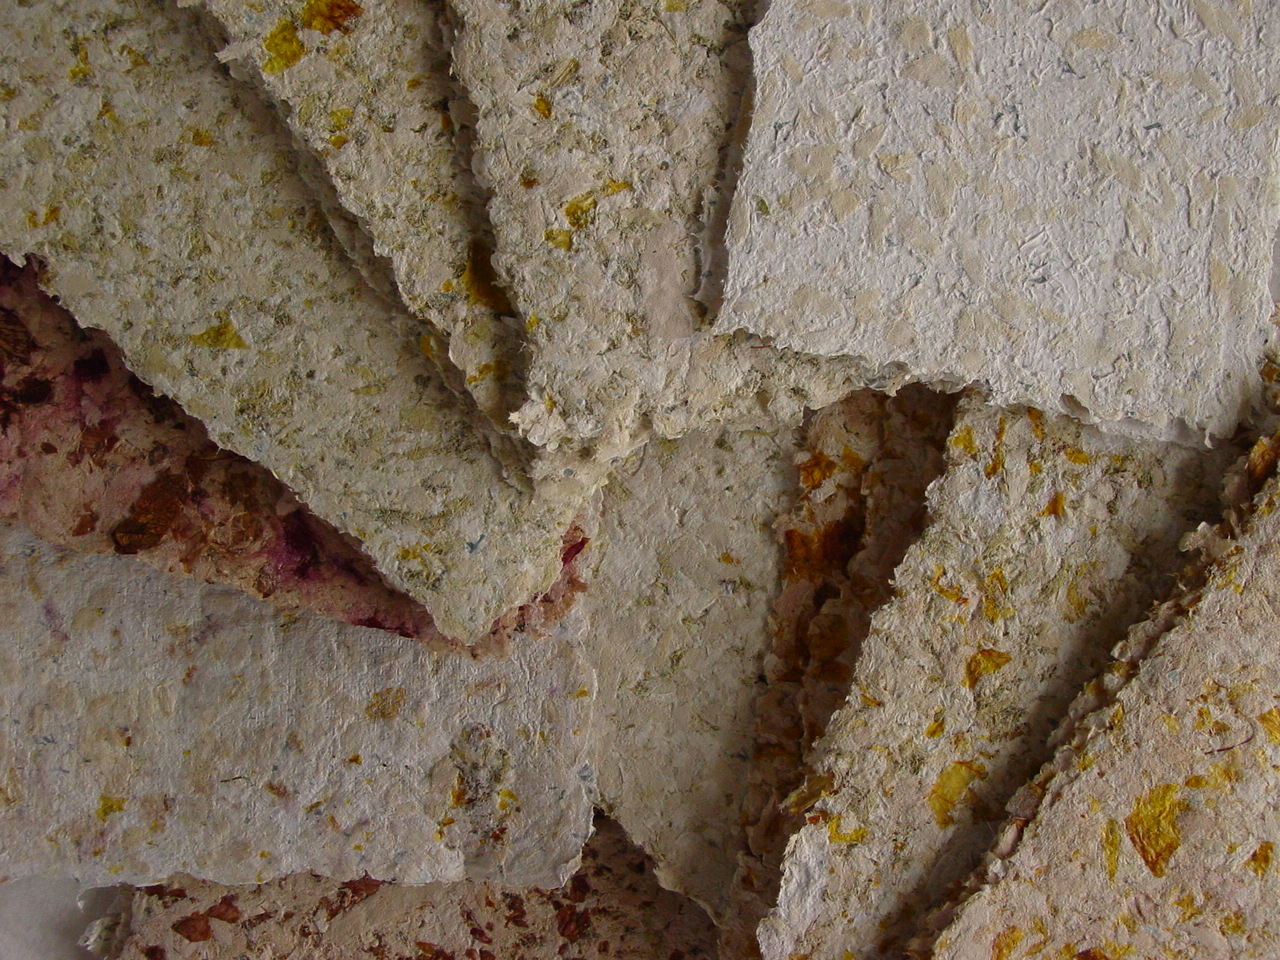
Heirloom Hand-Made Papers
Last Saturday was the Auckland Area Creative Fibre A.G.M. and I was asked to set up a display table showing the basic process of how to make sheets of re-cycled paper. Making paper from scratch is always a fun activity, and the results look gorgeous. No matter that the ones that include a lot of fresh or dried organic material are more decorative than functional. They always seem so very Victorian and feminine, and are beautiful additions to any craft project that incorporates paper as a decorative element.

Sampler Booklet
For my paper-making workshops I like to spend the morning making the sheets with the students, stop for a shared lunch while the paper dries, and then spend the remaining time putting all our hard work together in the form of a keepsake record sampler book. It always makes for a day of great fun, good food and interesting people. Listening to the reasons why each person wants to learn this basic, environmentally sound technique I find it is usually to enhance or to support a completely different skill or hobby. Mainly envisaged as being used for presentation paper for anything from home preserving to hand-made cosmetic or soap products. Some just want to work with the pulp so that they can go away with the experience and explore the moulding or casting possibilities their art direction is leading them towards. It is this  very broad end use aspect that makes basic paper-making such a very cool medium to explore. 


It is fine to reconstitute waste paper for use as writing/drawing paper, however a good quality end paper is dependent on the initial materials used in the pulp mix. 
Keep those photo-paper off cuts in mind next time you are trimming up the edges, and put them aside separately with other better quality papers if you are wanting to make acid-free sheets for exhibition quality drawing or painting. 


Also, if you are looking for waste paper to re-cycle, a good source for raw materials are the offices of local law or architect businesses. Their shredded paper waste is usually made up of better quality papers and light card and they are usually o.k. with passing it on for paper-making purposes.

Wednesday, November 23, 2011

Work in Progress


New work on the loom, just to keep interest going on what I have been up to. Little else to show you at this stage..... garden grows, years end screaming to the finish line, and not enough hours in the day.

Saturday, November 5, 2011

1960's Modernist Cut Pile Carpet/Sampler


Measures approx. 30x37cm
This is is a sampler or small wall hanging I have had for several years and although it is not a Tapestry weaving, it is hand woven. I assume it was made in the 1960's, possibly for the tourist market, and probably originates from somewhere around Egypt or Morocco. The artist/weaver was well ahead of their time and this small hand-woven cut pile rug is a classic for those interested in the history of graphic design and its use in the 20th century textile arts movement.

Wednesday, November 2, 2011

Tapestry Weaving and Social Comment


Jeanette
This weaving measures approximately 30x38cm. The warp is set at 11 e.p.i. with the weft constructed from silk, cotton, wool and rayon. 


I very much enjoy the process of naming my tapestry works. They often have two titles, one which is used while I weave it and a second that sometimes takes over once it is removed from the loom and the work is being tidied up and mounted for show. Long and explanatory titles are usually shortened to a single word or name, as the one shown here has been. 

The title sometimes gives a hint of my own intention or social comment. Some titles are self explanatory while others may be very obscure. This  particular weaving symbolizes the road we are taking towards a genetically engineered future.


I think what makes tapestry stand out so starkly from other forms of weaving, is that it has the ability to convey a story. Whether it is a large and complex set of images presented as a large and busy scene, or simply a small stark image, they both have the ability to convey very obvious subject matter, which is then open to interpretation.

As an artist/weaver I understand that the viewer may not completely understand my sense of humour, my intended comment or what my story is. 
However I believe each and every individual interpretation of the image is as entirely valid as my own. For me, every different interpretation or perspective of what the piece may mean gives me a small glimpse into another persons life journey. It is this validation of the viewers interaction with the design that changes the piece from an internal expression to an external sharing of human experience.

Friday, October 28, 2011

The weaving that didn't want to be woven!!


I have been thinking about the wisdom of sharing my recent disaster on the loom. After all, this blog is a showcase of what should be varied and interesting hand-woven tapestries that are worked smoothly from woe to go. This time it has gone from woe to woes.  Should I be sharing my failures as well as the pieces that I am happy with? Probably, as the planning and background that went into it were well developed and substantial. I like to think that those of you following this blog will be able to identify with the frustration of an idea not coming to fruition despite the best of intention and planning. So here is a tribute to all the learning curves, set-backs and oddities of those works that fought us and taught us along the way to perfection. May they be far and few between.


The warp, showing a good dozen or so warp threads broken at the other end of the loom.

Shown in the fore-ground is my first attempt at this weaving. You can see the initial heavier tan cotton warp I was using. I decided the warp spacing was too close and should have been set at about 8 epi so cut it off the loom. Because the warp was set at 12 epi, it created a bow/spread in the selvedge and slight ridging in the woven area. 


I  re-warped with a finer white cotton warp and started weaving again, but because of the slow progress in weaving, the warp wasn't constantly being wound through the heddles, and because of the constant changing of the shed using metal heddles, I slowly sliced through the warp. With every other loom I have ever bought, the first thing I have done is remove all the metal heddles and replaced them with handmade cotton ones. This is  mainly because I have never liked the noise that the metal ones make when I'm constantly changing the shed as I weave. I also like to make sure that my home-made ones have a generous sized threading hole in them to allow for bulky yarns or knots created when tying on/extending a new length of warp. This is the first time I haven't bothered to do so, so it was a very unexpected and nasty surprise to have my warp slashed. Oh well, you live and learn. 


I have now over-simplified the design and will try again to weave a smaller weaving using only one smaller section of the design. I'll keep you posted to see what happens with this third and final attempt! 

Loving those Miniatures

Re. my previous blog about posting my progress as I weave my new piece. That was a bad omen.

I have Ssooooo had difficulty with this new loom. Should one share ones failures??? Of course.

So next time I WILL post up photos of the disaster/s that should have been humming along nicely by now. 
I suspected the warp was all wrong to begin with and that it may cause some worry. However in the end I cut it off and re-warped with a nice light-weight but good quality cotton warp, only to find that the metal heddles were slowly, silently and maliciously slicing the warps as I was weaving down the other end of the loom.  "Ggggrrrrrrr..."   said I.

Dream State
Any way here are some miniatures for your perusal, the middle piece expresses very well the folly of continuing with weaving and documenting the piece I was going to do. I have totally simplified the design and will post that up at a later date, probably altered somewhat.


Pissing in the Wind

Chester...... With Spots

Monday, September 19, 2011

Tapestry in the Making


These are the first couple of pics of the tapestry I will be documenting as I weave it. Full detail of the colour is going to be dictated by just how fussy I decide to be as time goes on. However it looks as though this left-hand panel will be following reasonably closely to the script. 

The warp-up was a total pain as I haven't used this loom before. Although I won't go into detail here, the warp could prove to be a problem at a later date. I hope not!

Set at 12 e.p.i. on a coloured cotton warp. There is a small degree of fluting/corrugation in the warp, but I believe this is due to the warp-up rather than the weft materials being used as there is no actual splay in the warp spacing as I continue to weave at this stage. It will iron out fine once the spacing has been removed at cut-off time, which is hours and hours and weeks away. By that time I will have sorted it I hope!


Photo 1 The very beginning.


These three sections (the woman, the door and the teacup )will be woven as one complete panel.
 I will keep a visual record of the left hand panel to share with you on the blog.


Photo 2 Introducing the splashes of colour that dominate this design.


Tapestry Weavings By Stephenie Collin


WELCOME TO MY BLOG....


I hope you find Warped Art & Design both interesting and inspiring, and that it will encourage anyone working with fibre to investigate and experiment further within their chosen field.


The basic loom, which is my tool of trade, has remained technologically unchanged. This aspect appeals to me as I weave contemporary images on a machine of such simple and ancient construction.

And if the loom be silenced,
then needles, threads and fingers
have plenty more to say.


About Me

My photo
Waiuku, Auckland, New Zealand
I am an artist, weaver, gardener, mother and grandmother, home food gatherer, political sceptic, modest future eater, and much much more.